
Author Archives: Stephen Huffman

CAB Stands for

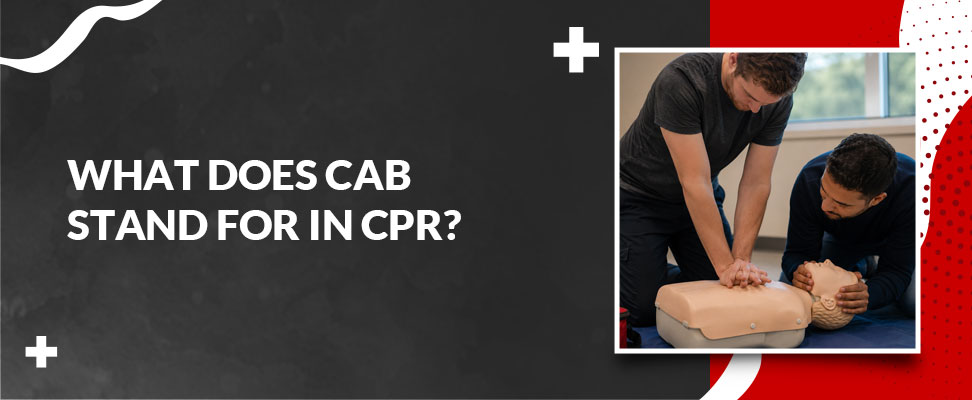
What Does CAB Stand For in CPR?

CAB in CPR stands for Compressions, Airway, and Breathing, and the order of those three letters is not a coincidence. It is the sequence the American Heart Association (AHA) directs rescuers to follow during cardiac arrest, and it has been the current standard since 2010. Starting with compressions instead of the airway keeps blood moving to the brain immediately, buying the critical minutes that matter most before emergency help arrives.

Key Takeaway

  • If you were trained before 2010, you likely learned the ABC sequence: Airway, Breathing, Circulation. The change to CAB was driven by a single, evidence-backed insight: getting blood pumping sooner saves more lives. According to the AHA, immediate bystander CPR can double or triple the chance of survival from out-of-hospital cardiac arrest, yet only around 41% of adults experiencing cardiac arrest outside the hospital receive CPR before emergency medical services arrive. Knowing the CAB sequence and knowing it well enough to act closes that gap..

C Is for Compressions

The C stands for chest compressions, not circulation. That distinction matters because in the older ABC method, the C at the end stood for circulation. In CAB, compressions come first, and for good reason.

For an adult, push straight down on the lower half of the breastbone at a rate of 100 to 120 compressions per minute and a depth of at least 2 inches (but no more than 2.4 inches). Allow the chest to fully recoil between each push, and keep any interruptions under 10 seconds. Those pauses cost blood flow, and blood flow is exactly what the brain and heart need in those first minutes.

A useful rhythm cue: the Bee Gees’ “Stayin’ Alive” is almost perfectly calibrated to 100 beats per minute. Hum it silently and let it pace your compressions.

A Is for Airway

After the first 30 compressions, open the airway. For most people, use the head tilt-chin lift: place one hand on the forehead, gently tilt the head back, and lift the chin with two fingers. This moves the tongue away from the back of the throat so air can reach the lungs.

If you suspect a neck or spine injury, use a jaw thrust instead. Slide your fingers behind the angles of the jaw and lift it forward without moving the neck. This technique takes a little practice, which is one reason hands-on training reinforces reading alone.

B Is for Breathing

The B stands for breathing, delivered as rescue breaths. After 30 compressions and opening the airway, give 2 rescue breaths, each lasting about one second, just enough to make the chest visibly rise. Then return immediately to compressions. Trained rescuers repeat this 30:2 cycle until an AED arrives, EMS takes over, or the person shows signs of normal breathing.

If you are untrained or uncomfortable giving rescue breaths, compression-only CPR is still significantly better than doing nothing. The AHA supports hands-only CPR for adults who collapse suddenly, because blood already contains oxygen in those first few minutes, it just needs a pump.

Why CPR Changed from ABC to CAB

For over 40 years, CPR training has focused on the airway. Rescuers were taught to open the airway and deliver breaths before placing their hands on the chest. Research showed that the sequence created an average 30-second delay before the first chest compression, and in cardiac arrest, those 30 seconds matter enormously.

In 2010, the AHA published its updated Guidelines for CPR and Emergency Cardiovascular Care, changing the basic life support sequence from ABC to CAB. The reasoning was clear: in the first few minutes after a sudden cardiac arrest, blood already holds oxygen. What the body lacks is circulation. Starting with 30 compressions, which takes roughly 18 seconds, moves that oxygen to the brain and heart immediately, delaying breaths by only a brief, manageable window.

According to peer-reviewed research published in PMC, for every minute without CPR and defibrillation, survival odds from witnessed cardiac arrest drop by 7 to 10 percent. Every guideline update since 2010 in 2015, 2020, and the landmark 2025 guidelines has kept the CAB order in place.

ABC vs. CAB at a Glance

Both sequences cover the same three tasks. The difference is the order and the meaning of the C.

Element ABC (Pre-2010) CAB (Current Standard)
First Step Airway: open the airway Compressions: start chest compressions
Second Step Breathing: give rescue breaths Airway: open the airway
Third Step Circulation: begin compressions Breathing: give rescue breaths
What the C Means Circulation Compressions (chest compressions)
Main Priority Oxygen first Blood flow first
Best Suited To Breathing-related emergencies, newborns Most sudden cardiac arrests, adults, children, and infants


So which is correct? CAB is the current standard for sudden cardiac arrest. The ABC approach still has a role in specific situations, more on those below.

The Three Cs of CPR and How They Fit with CAB

You may have come across the phrase “the three Cs of CPR” and wondered how it differs from CAB. The three Cs are a separate memory aid for what to do when you first arrive at any emergency:

  • Check the scene and the person for safety and responsiveness.
  • Call 911 and send someone to find an AED.
  • Care for the person by starting CPR.

In that final step Care the CAB sequence tells you how to perform the resuscitation itself. Think of the three Cs as your arrival checklist and CAB as your hands-on action plan.

How to Perform CAB: Step-by-Step

Here is the full sequence for an adult, as taught in nationally accredited CPR courses. Call 911 and send for an AED before beginning.

Check the scene and the person

Make sure the area is safe. Tap the person’s shoulders and shout, “Are you okay?” If there is no response and no normal breathing, treat it as cardiac arrest.

Call for help

Phone 911, put it on speaker, and ask someone nearby to locate an AED. A dispatcher can guide you through every step until EMS arrives.

Start compressions (C)

Place the heel of one hand on the center of the chest, on the lower half of the breastbone. Stack your other hand on top. Push straight down at least 2 inches at 100 to 120 per minute. Let the chest fully recoil each time and keep pauses under 10 seconds.

Open the airway (A)

After 30 compressions, tilt the head back and lift the chin. Use a jaw thrust if a neck injury is suspected.

Give rescue breaths (B)

Deliver 2 breaths, each about one second, watching for the chest to rise. If you are not trained or unwilling to give breaths, skip them and continue compressions.

Continue the 30:2 cycle

Repeat 30 compressions followed by 2 breaths. If two rescuers are present, switch the person doing compressions every 2 minutes to maintain quality.

Use the AED as soon as it arrives

Turn it on, expose the chest, attach the pads as shown in the diagrams, and follow the voice prompts. Resume compressions immediately after any shock.

CAB and the 2025 Chain of Survival

CAB is one link in a larger, coordinated sequence known as the Chain of Survival. The 2025 AHA Guidelines for CPR and ECC introduced a landmark change: a single, unified Chain of Survival that applies to all cardiac arrests, adult, pediatric, and neonatal, whether they occur in or out of the hospital. The key links are:

  • Early recognition and activation of emergency response (call 911, send for an AED)
  • Early high-quality CPR using the CAB sequence
  • Rapid defibrillation with an AED
  • Advanced emergency medical care
  • Post-cardiac arrest recovery and support

No single link works alone. According to the AHA 2025 guidelines summary, only about 41 percent of adults experiencing cardiac arrest outside the hospital currently receive CPR before EMS arrives. Starting compressions quickly buys time, but survival improves most when an AED arrives early for rhythms that respond to a shock. That is why calling for help and sending someone for an AED comes first, even before compressions begin.

The 2025 update also confirmed that children 12 years and older can be taught effective CPR and defibrillation, a meaningful step toward building communities where more people know how to act.

When CAB Is Used and When the Airway Comes First

CAB is the right starting point for most sudden cardiac arrests, when the heart stops without warning in an otherwise breathing person. But the original airway-first approach still has a place for emergencies that begin as a breathing problem.

Use CAB for most sudden, unexpected cardiac arrests. Choose an airway-first approach, prioritizing rescue breaths early in these situations:

  • Drowning
  • Choking that has progressed to unresponsiveness
  • Drug or opioid overdose
  • Suffocation or respiratory arrest from any other cause

In these cases, the arrest stems from a lack of oxygen rather than a primary heart problem, so getting air in early is critical. Newborns are a separate category entirely: newborn resuscitation follows its own airway-and-breathing-focused protocol and is not covered by the standard CAB sequence.

The practical rule: if a person suddenly collapses, start with compressions and follow CAB. If they stopped breathing first and the heart followed, as in drowning or overdose, breaths deserve early attention. When the cause is unclear, compressions are never the wrong place to start. A 911 dispatcher can help you assess the situation in real time.

CAB for Children and Infants

The CAB order applies across all age groups, with technique adjustments for smaller bodies.

Children

Use the heel of one or two hands and compress at least 2 inches (about one third of the chest depth) at 100 to 120 compressions per minute.

Infants

Use the heel of one hand if you are the only rescuer, or the two-thumb encircling technique if a second rescuer is present. Compress about 1.5 inches (roughly one third of the chest depth). Note: the two-finger technique is no longer recommended as of the 2025 AHA guidelines.

Single-rescuer compression-to-breath ratio: 30:2 for all ages. Two trained rescuers working on a child or infant: 15 compressions to 2 breaths.

Because many childhood cardiac emergencies begin with a breathing problem rather than a primary heart issue, rescue breaths carry extra weight in pediatric CPR. Parents, teachers, coaches, and caregivers benefit greatly from a course that covers all three age groups.

Hands-Only CPR and When Rescue Breaths Still Matter

Hands-only CPR means chest compressions without rescue breaths. For an adult who collapses suddenly in front of you, hands-only CPR is the recommended approach when you are untrained or not confident giving breaths. Removing that barrier means fewer people hesitate and immediate compressions are far better than no action while waiting for help.

That said, rescue breaths remain important in specific situations. Trained rescuers should give the full 30:2 cycle. Breaths are especially critical for children, infants, and arrests caused by oxygen deprivation, such as drowning or opioid overdose. The trained-rescuer ratio has not changed: 30 compressions to 2 breaths for a single rescuer.

Clothing, Bras, and AED Pad Placement

Remove or move any clothing covering the chest before placing your hands. For AED use, bare skin is essential. A bra, especially one with underwire, should be removed before attaching AED pads, since the wire can interfere with pad adhesion and shock delivery. Speed matters, but so does proper pad placement.

Get Certified and Ready to Act

Reading about CAB builds awareness. Practicing it builds the muscle memory and confidence to actually use it when it counts.

SimpleCPR offers nationally accredited online CPR and BLS certification courses that follow the latest AHA ECC guidelines, covering adult, child, and infant CPR in a single course you can complete in under an hour, from anywhere, at any time — if you’re weighing your options first, see Heartsaver vs. BLS: which CPR certification is right for you. Unlimited exam retakes are included at no extra cost, and your certification card is available to print the moment you pass.

Ready to certify or renew? First, compare our CPR certification course options, then start with the Adult-Child-Infant CPR/AED course, or if you work in healthcare, the Healthcare Provider BLS course covers the full professional scope. Need to renew? The CPR Recertification course refreshes the CAB sequence quickly so your skills stay sharp.

Certification is accepted across all 50 states and Canadian provinces. Get started at SimpleCPR.com.
BLS Certification

How Long Does BLS Certification Last?

Basic Life Support (BLS) certification is valid for two years from the date you complete your course. After two years, it expires, and you must recertify to stay current. The American Heart Association no longer offers a grace period, so the safest move is to renew before the expiration date printed on your card.

Key Takeaway

  • We hear from people who are months past their expiration date, hoping there is some kind of loophole. There rarely is. Below is exactly how the two year window works, when you still qualify for the shorter renewal course instead of the full one, and how to set yourself up so this question never catches you off guard again.

Key Highlights

  • BLS certification is valid for two years from your course completion date, not the day you enrolled or the day your card arrived.
  • The American Heart Association does not recognize an official grace period anymore. A 30 day cushion used to exist, and a lot of older articles still describe it, but it is gone.
  • Renewing 30 to 90 days before your expiration date keeps you eligible for the shorter renewal course instead of the full BLS Provider course.
  • Renewing early does not shorten your certification. Your new two years begin on the day you complete the renewal, so renewing ahead of schedule adds runway instead of costing you any.
  • Research on CPR skill retention shows hands on competency can start fading within weeks of training, which is the real reason the certification cycle resets every two years.
  • Simple CPR’s Healthcare Provider / BLS Professional CPR course is fully online, usually takes 30 to 60 minutes, and lets you print your card the moment you pass.

How Long Is BLS Certification Valid

Basic Life Support certification is good for two years from your course completion date. That rule holds across the American Heart Association and the accredited alternatives that build their training on AHA guidelines, including Simple CPR’s own Healthcare Provider / BLS Professional CPR course.

The American Heart Association issues its certification as a digital eCard. That eCard lists your completion date, an expiration date set two years out, and a unique code an employer can use to confirm your status. One detail that trips people up: AHA cards expire on the last day of the month two years from when you finished, not on the exact calendar date. Complete your course on March 14, 2024, and the card is good through March 31, 2026, not March 14. AHA’s own course card documentation spells this out directly.

The two year rule is the same whether this is your first certification or your fifth renewal. Every successful recertification resets the clock for another full two years.

When Does Your BLS Certification Actually Expire

Your expiration date is set by the day you finished your course, not the day you registered or started studying. You can confirm it in three ways.

  • Check the date printed on your card or digital certificate.
  • Use your provider’s certification lookup tool if one is available.
  • Contact the organization that issued your course directly.

A simple system works well here. Set a reminder 90 days before your expiration date and another at 30 days. The first gives you time to compare renewal options and check what your employer actually requires. The second is your final prompt to get it done before the shorter renewal window closes for good.

BLS Renewal vs Retaking the Full Course

This is where timing actually matters. A renewal course, sometimes called recertification, is shorter and cheaper than the full initial class, but you only qualify for it if your certification has not lapsed. Once it expires, the standard requirement is to start over with the full BLS Provider course.

Certification Status

What You Qualify For

What To Do Now

Current, expires in 90+ days

Standard renewal course

Schedule your renewal 30 to 90 days out so you keep the shorter option.

Current, expires within 30 days

Standard renewal course

Renew now. You still qualify, but the window is closing.

Expired, under current AHA policy

Full initial BLS Provider course

Enroll in the full course. The shorter renewal is no longer available to you.

Expired, but your provider or employer allows leniency

Sometimes a renewal course

Get this confirmed in writing by both your provider and your employer before relying on it.

A note on the 30 day grace period you may have read about elsewhere. It is one of the most repeated pieces of outdated information in this space. The American Heart Association did offer a short grace period in the past, and several older articles still describe it as current, but it was discontinued, and the AHA does not officially extend any grace period today. Some individual training centers and some employers still build in their own short cushion as a matter of internal policy, and that policy can vary for non-AHA certifications, so never assume you have extra time. Confirm with both your provider and your employer before your card expires, not after.

Does Renewing Early Cost You Time

No, and this is one of the more common misunderstandings about recertification. Your new two year period begins on the day you complete your renewal course, not on your old expiration date. That means renewing a month or two ahead of schedule does not shave anything off your certification. If anything, it adds a little extra runway, since your new two years start counting from a date that is earlier than your original deadline would have allowed.

Most professionals renew 30 to 60 days before their card expires for exactly this reason. There is no downside to going early, and it removes any risk of a lapse caused by a busy calendar or limited course availability.

Can BLS Certification Ever Last for Life

You may have seen offers for lifetime certification and wondered what that actually means. A BLS credential itself is never valid for life. To stay compliant and accepted by employers, it still has to be renewed on the standard two year cycle.

What a lifetime certification option actually provides is unlimited free renewals. You pay once up front and recertify at no additional course fee every cycle after that, rather than receiving a card that never expires. Simple CPR’s Lifetime Certificate works this way, and it can be a genuine savings if you renew faithfully every two years for the rest of your career. If a provider implies their card never needs renewing at all, treat that as a red flag. A card that ignores the two year standard will not reliably satisfy a healthcare employer.

Who Needs to Keep BLS Certification Current?

BLS shows up across a wide range of roles, and what happens when it lapses depends on the field.

  • Healthcare professionals. Nurses, physicians, respiratory and physical therapists, dental staff, and home health aides typically need a current BLS card for employment, clinical privileges, and licensing.
  • First responders and public safety. EMTs, paramedics, firefighters, and many police and security personnel must hold active certification, and in most cases cannot work in these roles with an expired card.
  • Community and workplace roles. Teachers, childcare and daycare providers, coaches, lifeguards, camp staff, and workplace safety officers often need or benefit from current BLS or CPR training even when it is not strictly required.

Always check your specific employer’s policy. Some require certification from a particular provider or in a particular format, and many run automated tracking that flags an upcoming expiration before it becomes a problem. Our piece on why BLS training matters goes deeper into who benefits most from staying current.

BLS Versus CPR Certification: Are They the Same

Not exactly, and the difference matters when you are choosing a course. BLS is the more advanced, provider level credential built for healthcare workers and professional rescuers. It covers high quality CPR for adults, children, and infants, AED use, bag mask ventilation, choking relief, and team based resuscitation. A general CPR or Heartsaver course is aimed at the public and workplace responders and goes into less clinical detail. Both follow the same two year renewal cycle, but healthcare employers almost always specify BLS rather than a basic CPR card. If your employer just says CPR certification is required, it is worth asking whether they actually mean BLS, since the two are not interchangeable for most clinical roles.

Our piece on CPR vs BLS covers this comparison in full, and Heartsaver vs BLS is worth a look if you are choosing between the two for the first time.

How to Renew Your BLS Certification

Renewing is straightforward once you know your status. The process usually looks like this.

  • Confirm your expiration date and check whether you still qualify for the renewal course.
  • Choose a course format that fits your schedule, whether that is fully online, blended with a brief hands on check, or in person.
  • Complete the coursework and pass the required exam.
  • Receive your updated card, valid for another two years.

Because acceptance varies by employer and by state, it is worth confirming that your chosen format meets your workplace’s requirements before you enroll, especially if a hands on skills verification is specifically mandated for your role.

Simple CPR built its CPR Recertification Online course around this exact problem. It follows AHA and OSHA aligned guidelines, takes about 60 minutes or less, comes with unlimited free retakes, and gives you a printable card the moment you pass. If you are managing renewals for a whole team, our group rates make that considerably easier to coordinate. And if you would rather never think about a course fee again, the Lifetime Certificate option lets you pay once and recertify free every cycle after.

Keep Your Next Two Years Easy

The two year cycle is not going anywhere, and that is a good thing. It is what keeps a BLS card meaningful when an employer, a patient, or a stranger is counting on it. The only real decision is whether you handle your next renewal on your own schedule or scramble for one on someone else’s.

Simple CPR’s Healthcare Provider / BLS Professional CPR course and CPR Recertification Online program make that decision easy, with a fully online format you can finish in under an hour, unlimited retakes, and a card you can print the second you pass. Get it done now, set your 90 day reminder for next time, and you will not have to ask this question under pressure again.

How Long Do Bloodborne Pathogens Survive on a Surface?

Blood on a countertop, a dried spot on a gym bench, a smear on medical equipment, or a stained fabric seat can raise the same worry. How long is it actually dangerous? The answer depends on the specific organism, the amount of blood, the surface, and the environment, but the core takeaway is simple. Treat any visible blood or potentially contaminated fluid as infectious until it has been adequately cleaned and disinfected. This guide explains what bloodborne pathogens are, why surface contamination matters, what factors affect bloodborne pathogen survival, what we know about key viruses, and how to clean safely using the same principles required in many workplaces.

Key Takeaway

  • Bloodborne pathogens can survive on surfaces longer than many people expect, depending on the virus, surface type, and environmental conditions. Because survival times vary, any visible blood or potentially contaminated fluid should always be treated as infectious and cleaned promptly using proper disinfecting procedures.

What Are Bloodborne Pathogens?

Bloodborne pathogens are disease-causing microorganisms that can contaminate human blood and certain other body fluids, potentially infecting another person through blood transfusions or other exposures. In workplace safety discussions, the most commonly referenced viruses are the hepatitis B virus, the hepatitis C virus, and the human immunodeficiency virus. Hepatitis B is often shortened to HBV, hepatitis C to HCV, and human immunodeficiency virus to HIV.

Blood is not the only concern. Many standards also include other potentially infectious materials, often referred to as OPIM. OPIM can consist of certain body fluids, as well as items or materials contaminated with blood or other fluids where blood is present or reasonably anticipated. When a situation involves blood or OPIM, the safest default is to assume infectious risk and follow proper cleanup practices.

Why Surface Survival Matters

Surface survival matters because contamination does not always stay where it starts. Blood can transfer from a surface to hands, gloves, tools, door handles, phones, or clothing. That pathway is often described as fomite transmission, meaning germs hitch a ride through contaminated objects or surfaces.

For bloodborne pathogens, the highest risk events often involve direct contact with blood through broken skin, punctures, or splashes to mucous membranes — which is exactly why CPR breathing barriers matter during rescue breaths. Surfaces still matter because they can create secondary exposures. Someone touches dried blood, then rubs a cut, wipes sweat near the eye, or handles sharps. In workplaces such as healthcare, dental, emergency response, housekeeping, laboratories, and custodial services, surfaces are a significant part of the daily exposure potential. In homes and public spaces, the risk is usually lower; however, the rule remains the same. If you see blood, do not guess. Clean it correctly.

Factors Affecting Pathogen Survival

Pathogens do not behave uniformly in all conditions. Survival depends on temperature, humidity, light exposure, the type of surface, the amount of blood present, and the concentration of virus in that blood. Understanding these factors helps you assess risk more accurately and choose effective cleaning methods.

Temperature & Humidity

Temperature and humidity affect how quickly blood dries and how stable a virus remains once it is outside the body. Warm, dry conditions often speed drying, which can reduce survival for less stable organisms. Cooler or more humid environments can allow blood to stay wet longer, and moisture can protect some pathogens from rapid breakdown. Extreme heat and repeated temperature cycling can also degrade viral particles more rapidly, while moderate indoor climates can allow for longer persistence of hardier viruses. These environmental conditions explain why the same spill can pose different risks depending on its location.

Surface Type

The difference between porous and non-porous surfaces matters. Non-porous surfaces, such as stainless steel, plastic, and sealed tile, tend to retain contaminants on their surface, where they can be contacted and where disinfectants can reach. Porous surfaces, such as fabric, unfinished wood, cardboard, or carpet, can absorb blood, making cleanup more challenging and reducing the effectiveness of disinfectants. Absorption may reduce transfer to hands on the surface level, but it can also protect pathogens inside fibers, increasing the chance of incomplete decontamination if cleaning is rushed.

Blood Volume & Viral Titer

More blood generally means more protection for pathogens and a larger contaminated area. A tiny droplet dries quickly, while a larger spill may remain wet for longer and can seep into seams or cracks. Viral concentration matters too. A higher viral titer means more infectious particles per volume of blood, which can raise the chance that some remain viable after drying. This is one reason professional protocols treat all blood as potentially infectious rather than trying to judge risk based on appearance alone.

UV & Sunlight Exposure

Ultraviolet light and direct sunlight can damage viral genetic material, accelerating its breakdown. Outdoor exposure, bright sunlight, and UV sources can reduce viability over time. However, sunlight is an unreliable safety plan. Shade, debris, fabric weave, grime, and uneven exposure can leave protected areas intact. The practical takeaway is that UV can help explain why some exposures are lower outdoors, but it does not replace a proper surface cleaning protocol.

Survival Times of Key Pathogens

When people ask how long bloodborne pathogens live on surfaces, they usually want a simple number. The honest answer is that survival varies. Still, we can describe typical patterns for the major viruses of concern, while remembering that cleaning should never wait for “natural die-off.”

Hepatitis B Virus (HBV)

HBV is known for being resilient. One widely cited benchmark is that HBV can survive in dried blood on surfaces for at least one week, which is why HBV surface longevity is taken seriously in workplace safety and why prompt cleanup is crucial, even when blood appears dry.

Hepatitis C Virus (HCV)

HCV can also persist outside the body longer than many people expect under typical indoor conditions. A commonly referenced finding is that HCV remains infectious on surfaces for up to 6 weeks at room temperature, which highlights why the infectivity time of HCV is a key concern in settings where spills may be missed.

Human Immunodeficiency Virus (HIV)

HIV is generally less stable on surfaces than hepatitis viruses. Outside the body, it tends to break down quickly as conditions change and fluids dry. That is why HIV surface risk from dried blood on objects is typically lower than for hepatitis, even though any visible blood should still be treated as potentially infectious and cleaned correctly.

Survival on Common Surfaces

The surface affects both the difficulty of cleanup and the ease with which contamination transfers to hands. The table below focuses on practical takeaways rather than exact durations, as the safest approach is immediate cleaning with correct disinfection, regardless of the surface.

Environmental & Chemical Influences

Environment sets the stage, but chemistry ends the story. Dryness, heat, and sunlight can reduce viability over time, yet decontamination should not rely on waiting. The goal is to remove organic material first, then apply a disinfectant that works on bloodborne pathogens and keep it wet for the correct duration. Two concepts matter here. First, cleaning and disinfection are not the same. Cleaning removes soil and blood, allowing a disinfectant to reach the surface. Second, disinfectants require the correct contact time, meaning the surface must remain visibly wet for the duration listed on the product label.

Indoor vs Outdoor & Seasonal Variations

Indoor environments often maintain moderate temperatures and stable humidity, which can allow some pathogens to persist longer than in harsher outdoor conditions. Outdoors, wind, sunlight, and temperature swings can reduce survival, but they can also spread contamination if blood is disturbed. Seasonal changes also influence how quickly fluids dry. Winter indoor heating can create dry air and accelerate drying, while humid seasons may slow down the drying process. Regardless, the correct response remains unchanged. Use universal precautions and clean as if the patient is infectious.

Disinfectants & Decontamination

Choose EPA-approved disinfectants that list efficacy against HBV and HCV when available and appropriate for the surface. In many settings, a fresh household bleach solution is used for blood cleanup, with the exact bleach solution ratio depending on the situation and the product directions. Larger spills require a more substantial dilution than small smears, and the surface must remain wet for the duration of the contact time needed. Alcohol-based products can be effective for specific use. Still, theymay evaporate too quickly to meet the required contact time on larger areas, and they are not ideal when heavy organic material is present. Whatever you use, read the label, ensure proper ventilation, and avoid mixing chemicals.

Real-World Risk Scenarios

In healthcare, the main risk is not only the visible blood spot on a counter, but also the invisible risks that can be detected only through thorough examination. It is the chain of touch points after that spot exists. A glove comes into contact with contamination, then touches a drawer handle, and subsequently, another person touches it, resulting in a small cut. In homes, blood may appear from nosebleeds, injuries, or caregiving situations, and cleaning may be delayed because people often underestimate the presence of dried blood spots, even when the underlying injury still needs basic RICE treatment. In public spaces, small bloodstains may occur in restrooms, gyms, transportation seats, or on sidewalks. Crime scenes and emergency responses introduce additional complexity because blood may be widespread, mixed with debris, and present alongside sharps. Across all scenarios, the same priorities apply. Limit exposure, use barriers, remove visible soil, disinfect correctly, and finish with hand hygiene.

Prevention & Decontamination Best Practices

Start by keeping other people away from the area. If there is fresh blood, avoid direct contact and refrain from wiping dry at first, as this can spread contamination. Put on PPE for cleanup, such as disposable gloves, and add eye protection and a mask if splashing is possible — precautions covered in most Standard First Aid certification courses. If there are sharps or broken glass, do not pick them up by hand. Use tools and a puncture-resistant container.

Next, remove visible blood using absorbent material, working from the outside inward to avoid spreading. Then, clean the surface with detergent and water to remove any remaining residue. After cleaning, apply a suitable disinfectant, ensuring the entire contaminated area stays wet for the stated contact time. Pay attention to seams, grout lines, and textured surfaces where residue can hide. After disinfection, allow the surface to air dry when possible. Dispose of used materials in a sealed bag and follow local rules for disposal, especially in workplaces.

Finish by removing gloves carefully so you do not contaminate bare skin. Wash hands immediately with soap and water, making hand hygiene the final non-negotiable step. If soap and water are not available, use sanitizer until proper washing is possible; however, do not rely on sanitizer as a complete substitute after heavy contamination.

Common Myths vs Facts

One common myth is that once blood dries, it becomes harmless. Drying reduces risk for some organisms, but it does not guarantee safety, especially for hardier hepatitis viruses. Another myth is that a quick wipe with a paper towel solves the problem. Wiping can spread contamination, and disinfectants may fail if blood residue remains. A third myth is that only healthcare workers need to worry. Anyone cleaning blood from a home bathroom, gym equipment, or a car seat can be exposed if they skip the use of barriers and proper disinfection.

A more subtle myth is that you can judge risk based on the age of a stain. Dried stains can persist visually for a long time, even when viability declines, and fresh-looking spots can sometimes be less risky than assumed, depending on the conditions. The same is true of everyday injuries — many people still get sprained ankle treatment wrong by guessing instead of following the correct steps. The safest approach is not guesswork. It involves the consistent use of universal precautions, proper disinfectant use, and reliable cleanup practices.

Wrapping up

Surface risk is manageable when you treat blood as potentially infectious and respond consistently every time. Use universal precautions, wear PPE for cleanup, clean before disinfecting, follow label directions for EPA-approved disinfectants, and protect yourself with careful disposal and strong hand hygiene. If your work includes any exposure potential, keep your exposure control plan current and stay up to date on training. For a practical next step beyond cleanup, consider also learning lifesaving response skills. Simple CPR’s online certification can help you build confidence in emergencies where quick action is crucial, whether at work, at home, or in public.