Author Archives: Stephen Huffman

Head-Injury Warning Signs in First Aid: What Pupil Checks Can and Cannot Tell You

A pupil check can be a useful observation after a bump, blow, or jolt to the head. It is not a concussion test, and normal-looking pupils do not rule out a concussion or another serious injury. First aid starts with the person’s overall condition, not a focused eye exam.

Key Takeaway

  • Checking pupils after a head injury can help identify warning signs of a concussion or serious brain injury. Watch for unequal pupils, vision changes, confusion, or worsening headaches. Pupil checks cannot rule out a concussion, so seek emergency medical care for unequal pupils or other serious symptoms./li>

If someone has a new difference in pupil size after a head injury, or shows any emergency warning sign, call 911 or have them taken to an emergency department right away.

Put first-aid priorities ahead of a pupil check

Scene safety, responsiveness, breathing, and life-threatening bleeding come first. Do not delay those checks to look at a person’s pupils.

If the area is safe, get help and assess the person’s condition. A person who is unresponsive, not breathing normally, or has severe bleeding needs immediate emergency action based on your training and dispatcher instructions. After a head injury, avoid unnecessary movement, especially of the head and neck, while you wait for professional help.

Once urgent threats have been addressed, continue watching the person. Note changes in alertness, breathing, behavior, speech, balance, or symptoms. This broad observation is more useful to emergency responders than repeatedly checking one sign.

A pupil observation does not diagnose or rule out concussion

Concussion symptoms can affect how someone feels, thinks, acts, sleeps, or moves. They may appear immediately or develop over the following hours or days. A person can have a concussion with pupils that look equal and react normally to light.

Watch for symptoms such as headache, dizziness, nausea, balance problems, sensitivity to light or noise, vision problems, trouble concentrating, memory problems, confusion, irritability, unusual fatigue, or changes in sleep. The person should stop the activity that led to the injury and be evaluated by a healthcare professional.

Pupil size can also vary for reasons unrelated to a head injury. Some people naturally have pupils that are slightly different in size. In a first-aid setting, the concern is a difference that is new after an injury, particularly when it occurs with worsening symptoms or altered consciousness.

Unequal pupils and other head-injury danger signs

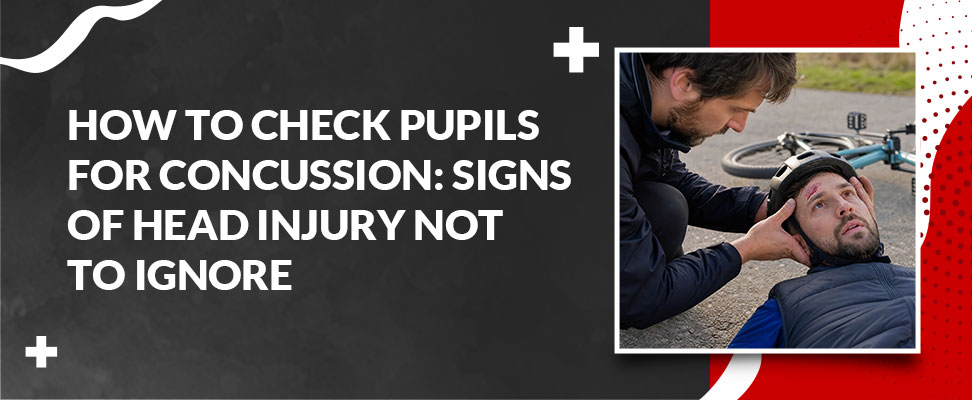
A new pupil that is noticeably larger than the other after a bump, blow, or jolt to the head is a medical emergency warning sign. Call 911 or seek emergency care immediately. Do not wait to see whether it improves, and do not rely on a pupil check to decide whether another serious symptom matters.

Emergency care is also needed when a person has any of the following after a head injury:

  • A headache that worsens or does not go away

  • Repeated vomiting

  • Weakness, numbness, or reduced coordination

  • Slurred speech, unusual behavior, increasing confusion, restlessness, or agitation

  • A seizure or convulsion

  • Trouble recognizing people or places

  • Loss of consciousness, extreme drowsiness, or inability to wake up

  • A child who will not stop crying, cannot be consoled, or will not nurse or eat

Stay with the person, monitor changes in breathing and responsiveness, and follow instructions from 911. Do not give food, drink, alcohol, or medication unless directed by a healthcare professional.

PEARL and PERRLA: useful clinical terms, not lay diagnostic tests

You may hear pupil-response terms in first-aid or clinical settings. PEARL is commonly used to mean “pupils equal and reactive to light.” PERRLA adds “round” and “accommodation,” referring to how the eyes adjust focus between near and distant objects.

These terms describe observations in a broader clinical assessment. They do not establish whether someone has a concussion, and a layperson does not need to perform a detailed PERRLA assessment before calling for help. In a suspected head injury, a brief comparison of both pupils may help you notice a concerning change, but it must never distract from emergency priorities or professional evaluation.

Avoid repeatedly shining a bright light into someone’s eyes or trying to interpret subtle differences. Tell responders what you saw, when you noticed it, and whether the change followed the injury.

What to observe and report after a possible concussion

A clear handoff can help emergency responders and healthcare professionals. If it is safe to do so, keep track of what happened and what changed afterward:

  • The time and mechanism of injury, such as a fall, collision, or blow to the head or body

  • Whether the person lost consciousness, seemed confused, or had memory gaps

  • Symptoms that began right away and symptoms that appeared later

  • Vomiting, seizure activity, worsening headache, speech changes, or trouble walking

  • Any new difference in pupil size or reaction that you observed

  • Medicines, allergies, and relevant medical information if known

Do not pressure the person to “walk it off” or return to play, work, driving, or other activity after a suspected concussion. A healthcare professional should guide the return to normal activities.

Why supervised first-aid training matters

Reading about head injuries can help you recognize important warning signs. It cannot replace practicing how to assess a scene, communicate with a 911 dispatcher, monitor a changing condition, and respond when someone becomes unresponsive.

Instructor-led, hands-on First Aid and CPR training gives learners the chance to practice skills, ask questions, and receive correction in real time. That supervised practice is especially valuable because head injuries can involve several competing concerns at once, including breathing, bleeding, possible spinal injury, and a person whose condition changes quickly.

SimpleCPR offers online First Aid and CPR training options, including courses that cover head-injury response as part of broader emergency preparedness. Before enrolling, confirm that the course format and certificate meet the requirements of your employer, school, licensing body, or local organization. [Add: verified link to any instructor-led or hands-on SimpleCPR option, if available.]

The practical takeaway

Pupil checks are one small part of observing someone after a head injury. They cannot confirm a concussion, and normal pupils cannot clear someone for activity or rule out a serious problem. Prioritize safety, responsiveness, breathing, and life-threatening conditions. Call 911 for a new unequal pupil or any other emergency warning sign, then keep monitoring the person until help arrives.

For everyday readiness, build on this information with First Aid and CPR education that includes supervised, hands-on practice when available. Explore SimpleCPR First Aid training and choose a course that fits your required training format.
How to Remove a Bandage That Is Stuck to a Wound Safely

A bandage can stick when dried blood or wound fluid bonds the dressing to healing skin. The safe response is patience, not force. Moisten the dressing, give it time to loosen, and remove it slowly. Pulling off a dry, stuck bandage can disrupt fragile healing tissue and make the wound bleed again.

This guide is for a minor wound with a dressing that has become stuck. It does not replace instructions from a clinician who is treating the wound.

Key Takeaway

  • Removing a stuck bandage safely helps prevent pain, skin damage, and disruption to the healing wound. Gently soak the bandage with warm water or saline until it loosens, then peel it back slowly without pulling or forcing it. If the bandage remains stuck, continue soaking and seek medical advice if needed. After removal, check the wound for signs of infection, such as increasing redness, swelling, warmth, or pus, and seek medical attention if the wound bleeds heavily or shows signs of infection./li>

Start with moisture, not pulling

Wash your hands thoroughly with soap and water before touching the dressing or wound. Dry them with a clean towel.

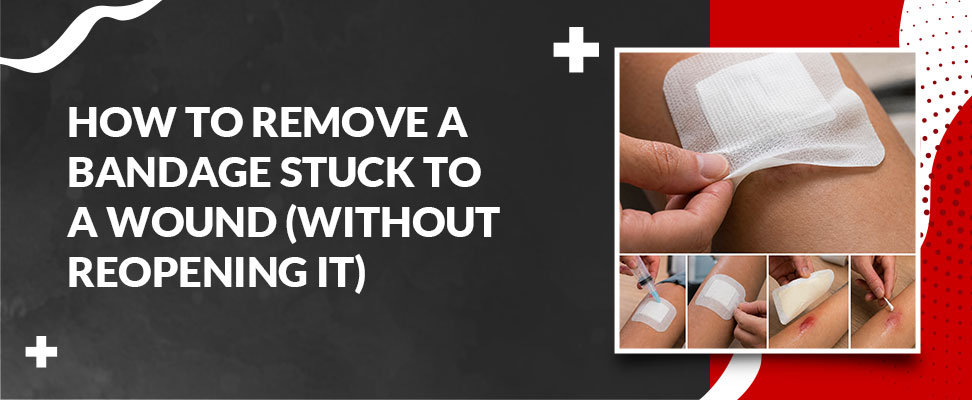
Use clean water or saline to wet the stuck part of the dressing. A clean, damp cloth or gauze pad placed over the bandage can help keep it moist while it loosens. If the location of the wound allows, soaking the area in clean water may also help.

Wait before testing an edge. The dressing should begin to release with gentle movement. If it remains attached, wet it again and allow more time. Do not pull through resistance, even if only a small area seems stuck.

Remove the dressing low and slow

Once an edge has loosened, hold the nearby skin steady with one hand. With the other, draw the bandage back slowly along the surface of the skin, almost folding it back over itself. Avoid lifting it straight up and away from the wound.

This low-angle technique reduces tugging on the skin and the wound beneath it. Move a little at a time. If you feel resistance, pain increases, or the wound starts to pull, stop. Re-moisten the area and wait again before continuing.

For an adhesive border that is stuck to intact skin, gently stretching the edge horizontally along the skin can help release the adhesive. Keep adhesive-removal products away from an open wound unless a healthcare professional or the product instructions specifically say they are appropriate.

After the bandage comes off

Discard the used dressing and wash your hands again. Take a moment to look at the wound without rubbing or scrubbing it.

For a minor wound, follow any existing care instructions. Do not routinely use harsh cleaning agents on the wound. If you were given specific directions after a procedure or injury, those directions take priority over general first-aid information.

A small amount of dried drainage on an old dressing can happen. New bleeding, a wound that has separated, or worsening pain deserves closer attention.

When a stuck bandage needs medical help

Stop trying to remove the dressing yourself and seek medical advice promptly if any of the following apply:

  • Bleeding is heavy or does not stop with direct pressure.

  • The wound opens meaningfully, separates, or begins bleeding again during removal.

  • The dressing remains firmly attached after repeated moistening and gentle attempts.

  • You notice increasing redness, swelling, warmth, worsening pain, pus or unusual drainage, fever, or feel unwell.

  • The wound is surgical, has stitches, staples, skin glue, packing, a drain, or a specialized dressing.

  • A clinician gave instructions about when or how the dressing should be removed.

Call emergency services for severe bleeding, or if the person feels faint, confused, has trouble breathing, loses consciousness, or has a serious injury. Do not remove an object embedded in a wound.

Avoid another stuck dressing

The right dressing depends on the wound, how much it is draining, and any instructions from a clinician. For minor wounds where a dressing is appropriate, a non-adherent pad may be less likely to stick than standard woven gauze.

Change a dressing according to its product instructions or the directions you were given. If a wound is draining, a dressing that becomes saturated, loose, or uncomfortable may need attention sooner. Surgical wounds and wounds managed by a clinician should be handled exactly as directed.

Build practical first-aid confidence

A stuck bandage is usually manageable when you slow down, moisten it, and refuse to force it. Knowing when to stop is part of good first aid, too.

For broader first-aid training, explore our online first aid courses. They cover how to respond calmly when an injury needs more than a simple dressing change.

Quick answers

How do you remove a bandage stuck to a wound without reopening it?

Moisten the dressing with clean water or saline, wait for it to loosen, then peel it back slowly along the skin while supporting the surrounding skin. Stop and re-moisten if there is pain or resistance.

Should you pull a stuck bandage off quickly?

No. Removing a dry dressing quickly can pull on healing tissue, cause pain, and restart bleeding. Moisture and time are safer than force.

What if the bandage will not come off?

Do not keep pulling. If repeated moistening does not loosen the dressing, contact a healthcare professional for guidance, especially if the wound is surgical, closed with stitches or glue, or has clinician-specific care instructions.

What are signs of infection after a dressing is removed?

Concerning changes include increasing redness, swelling, warmth, worsening pain, pus or unusual drainage, fever, or feeling unwell. Seek medical advice if these occur.

How to Choose an Instant Cold Pack for a First Aid Kit

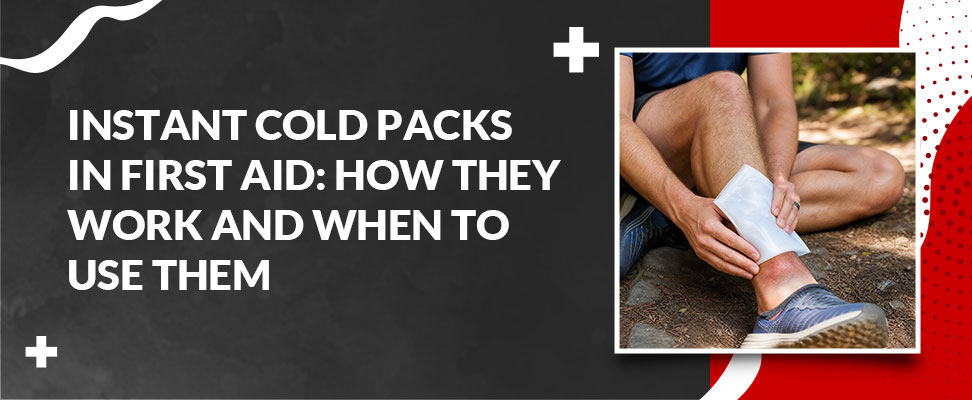
An instant cold pack is a practical first-aid supply when an injury happens away from a freezer. It stays at room temperature until activated, then provides short-term cooling for a minor bump, bruise, sprain, strain, or localized swelling. That makes it especially useful in a car, travel kit, sports bag, workplace kit, or outdoor pack.

Key Takeaway

  • Instant cold packs are a valuable addition to any first aid kit, helping relieve pain and reduce swelling from minor injuries. Use them according to the manufacturer’s instructions to protect the skin and ensure safe application. Keep them accessible at home, school, work, and during travel, and seek medical attention for severe or worsening injuries./li>

There is no single best instant cold pack for every kit. The right choice depends on the body areas you expect to treat, how the pack is made, whether it will survive storage and transport, and whether the label gives clear safety and disposal instructions.

Start with the injury location and pack coverage

Pack size matters because a cold pack should cover the affected area without being so large that it is awkward to hold in place. Compact instant cold packs are convenient for small joints and targeted areas, such as a wrist, hand, elbow, ankle, or the area around a minor bump. They also take up less room in a portable first aid kit.

A larger pack can be more useful for broader areas, including a knee, shoulder, thigh, or larger area of swelling. It can also be a better fit for a general sports or workplace kit, where the likely injury is unknown.

Avoid treating a particular dimension as universally best. Compare the pack's stated coverage area with the injuries most likely in your setting, and remember that body size, injury location, and the pack's shape all affect fit. A small kit may benefit from compact packs, while a larger kit may reasonably carry more than one size.

Why instant cold packs belong in portable first aid kits

Instant cold packs do not need a freezer. Most contain separate internal compartments that mix only when the pack is activated according to its instructions. The resulting reaction makes the pack cold within a short time.

That ready-when-needed design is the main advantage over a reusable gel pack in places where freezer access is uncertain:

●      Cars and roadside emergency kits

●      Travel bags and field kits

●      Hiking, camping, and outdoor activity gear

●      Sports sidelines and team bags

●   Worksites, school activity kits, and community spaces

For a sprain or swelling that occurs away from home, the value is availability. An unactivated instant pack can be kept with the rest of the kit instead of relying on someone to find ice.

Choose materials and construction with safe use in mind

Read the product label before purchasing, not after an injury. Look for clear instructions on activation, skin protection, storage, disposal, and what to do if the outer pouch leaks or is damaged.

If someone who may use the kit has a latex sensitivity or other material concern, confirm the pack's material information with the manufacturer. Do not assume that a pack is latex-free, non-toxic, or suitable for direct skin contact unless its labeling specifically says so.

The outer pouch deserves as much attention as the cooling mechanism. Select packs with intact, well-sealed packaging and avoid any pack that is swollen, punctured, damp, torn, or leaking. The contents of an activated or damaged pack are not meant for skin, eyes, or ingestion. If a leak occurs, stop using the pack, avoid contact with the contents, follow the manufacturer's first-aid and disposal directions, and seek further advice if exposure causes symptoms.

Use an instant cold pack safely for sprains and swelling

Cold can provide short-term comfort after a minor soft-tissue injury, but it is not a substitute for assessing the injury. The American Heart Association and American Red Cross first-aid guidance emphasizes recognizing the limits of first aid and seeking additional care when needed.[^1]

Place a thin cloth or towel between the cold pack and skin. Never apply an instant cold pack directly to bare skin, and do not use one on a fresh thermal burn. For a burn, cool running water is the appropriate immediate first-aid measure rather than ice or an instant cold pack.

Use the time limit printed on the product. SimpleCPR's first-aid guidance advises limiting an application to roughly 15 to 20 minutes and removing the pack sooner for excessive numbness, skin discoloration, or irritation.[^2] Check the skin and the person's comfort during use rather than leaving the pack in place unattended.

People with reduced sensation, poor circulation, diabetes, or vascular disease should get guidance from a healthcare professional before using cold therapy. Extra caution is also appropriate for young children and anyone unable to report discomfort.

Know when a cold pack is not enough

A cold pack may be reasonable for a minor injury while you monitor the person, but it should never delay emergency care. Call emergency services for abnormal breathing, unresponsiveness, new confusion, severe bleeding, severe pain, obvious deformity, or a suspected broken or dislocated limb or joint.[^1]

Professional evaluation is also appropriate when pain or swelling is severe, the person cannot bear weight or use the limb, numbness or weakness develops, the injured area looks deformed, or symptoms worsen instead of improving. When in doubt, treat the cold pack as a comfort measure while arranging appropriate care.

Store packs so they are ready to activate

An instant pack is only useful if its internal seal and outer pouch are still intact. Keep packs in a dry area of the kit where they are protected from sharp tools, crushing, and repeated bending. A small protective pouch can help separate them from scissors, tweezers, or other hard supplies.

During routine kit checks, inspect each pack for damage and read its expiration or replacement date. Replace any pack with compromised packaging, any pack past the manufacturer's date, and any pack that has been accidentally activated. Because instant cold packs are single-use supplies, replenish the kit after each use.

Instant cold pack versus reusable ice pack

Instant and reusable cold packs serve different situations. Neither is the right answer for every setting.

If you need…

An instant cold pack is often the better fit

A reusable ice pack is often the better fit

Cooling without freezer access

Yes

No, it must be frozen in advance

A supply for a car, travel kit, sports bag, or field kit

Yes

Only if reliable freezer access is available before departure

Repeated use at home

No, it is used once

Yes, if it remains intact and is maintained as directed

A compact emergency backup

Yes

It depends on available freezer space and planning


Many households and organizations keep both. A reusable pack is useful where a freezer is dependable, while an instant pack covers the unexpected moment when it is not.

A quick buying checklist

Before adding instant cold packs to a first aid kit, confirm that each option:

●      Fits the body areas and likely injuries for that kit

●      Activates as described without needing refrigeration

●      Has clear instructions for skin protection, use time, storage, and disposal

●      Provides material information relevant to likely users, including latex considerations where needed

●      Has sealed, undamaged packaging and a visible replacement date

●      Can be stored without being punctured, crushed, or accidentally activated

●   Is available in enough quantity to replace after use

The best instant cold pack for a first aid kit is the one that is appropriately sized, intact, clearly labeled, and available when no freezer is nearby. Pair it with basic first-aid knowledge, check it during routine kit maintenance, and seek medical help when the injury calls for more than short-term comfort.

Build confidence alongside your supplies with SimpleCPR's online first aid training, which covers how to recognize emergencies, provide initial care, and know when to get further help.